Modernize an Outdated Kitchen
Learn how a housewife remodels her kitchen to surprise her husband who will be returning home after being deployed in Afghanistan.
Her kitchen was still pretty and full of light. Most of the elements still worked and served its purpose but it was all quite old and outdated. Most of the doors on her cabinets no longer closed properly. Her countertops were scratched just like her floor with linoleum flooring. Both showed several stains as well. Although she had gotten brand new appliance to replace the old ones, she did not know where to install it so she just let it sit on her shed uselessly.
Things that you will need:
- Paint
- Utility knife
- Hammer
- Concrete board
- Pry bar
- Air compressor
- Primer
- Laminate countertop. Specifically choose the granite-style one.
- Drill
- Safety glasses
- Hoses
- Stainless steel. This is going to be used for the backsplash. Get it pre-cut beforehand.
- Birch plywood. This is going to be used for the cabinet doors. Ensure that it is ¾”.
- Painting supplies
- Miter saw. Specifically get the electric kind.
Procedure:
Before anything else, make sure that you turn off the gas line. Once you have secured that, you can now take away the stove and set it aside. Then proceed in taking away the every furniture in the kitchen. Once they are set aside, do the same with the appliances.
Next, take away all the contents of your cabinets. Use your utility knife and concentrate on taking off the upper part on the top molding of the cabinets on the higher level with the assistance of your pry bar. Follow up by using a hammer. Do the same thing with the baseboard trim that is surrounding the floor. Dismantle the cabinet doors and disassemble the hardware as well with the use of a screw gun. To make it easier for you to return them in their corresponding positions later on, put a label on every door. Do the same thing with the cabinet.
Detach the plumbing right below your sink. Proceed on working with your countertop, start from unscrewing down below. After that, get your utility knife and start scoring your caulk. As soon as the countertop is off, you can then proceed in removing the refrigerator. Once done, do the same with the cabinets around it.
The linoleum on the floor does not have to be removed until you start to refinish your cabinets.
 The cabinet is being prepared by sanding the paints off.
The next stage in this procedure, you will be working on your cabinets. Start by removing the screws from your base cabinet. Occupy the space right below your dishwasher as well as the seat of your base cabinets with plywood that is ¾” thick. This would allow you to move the newly acquired appliances effortlessly and more freely if they are sitting in one surface.
Once that is accomplished, start sanding the frames of your cabinet with the use of your orbital sander. Do not sand down too much, just enough to remove the finish.
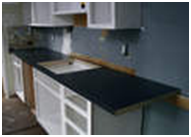
 The countertop is now set up. The sink is set a place from the hole that is made.
Position the countertop in its intended space but do not tighten just yet. Sketch the inner part of your base cabinet on your countertops’ undersurface. Ensure that the cutout you are making for the sink is precisely aligned. After that, position your sink with the upper part facing down on your countertops undersurface. Then, have the sink situated properly on all sides. Get a pencil and then mark the surrounding ends of your sink.
Next, follow the lines that you have marked and cut it with the circular saw. This is where the sink will be placed. Then, proceed in setting up your countertop. After that, mount the sink and establish it with the included hardware. Connect the needed drains. Do the same with the water connections.
Setting up the backsplash
The backsplash you have will include mounting hardware to ease up the establishment on your wall. It will also be used in getting the edges covered. Start off by taking the dimensions and then cut according to the measurements you have obtained. The edge at the base part should be seamed using your sealant. Ensure that you have the silicone caulk.
Next, you will now work on the doors of your cabinets. Get the birch plywood that you have cut to ¾ inch. From that you will cut off the doors in your cabinets with the assistance of your table saw. You would also need to use a circular saw for this. Once you are done, start to work on cutting for your drawer fronts. To avoid any confusion, put a label on every cut piece.
Finally, you can start priming. One done, proceed on painting. Allow it to dry. Then, ensure that your handles are situated where the hinges are by using a template for hardware. Then lastly, to complete the entire procedure, get your level and setup your cabinet doors with the help of a screw gun.
